Are you ready to dive into a world of cheesy goodness?
Picture this: you're sitting at a table, stomach rumbling, craving a slice of pizza. But how many slices are in a large Cottage Inn pizza? Fear not, pizza lover, for we have the answer!
In this article, we'll break down the math and reveal the slice count of Cottage Inn's delectable large pizza. Get ready to satisfy your pizza cravings and learn why Cottage Inn is the go-to choice for pizza enthusiasts like you.
Let's dig in!
Size Matters: Understanding Cottage Inn's Large Pizza
If you're wondering about the number of slices in a large Cottage Inn pizza, it's important to understand the significance of size when it comes to enjoying their delicious pies. Understanding portions and comparing sizes will help you make the right choice for your appetite.
The large Cottage Inn pizza is perfect for sharing with a group, as it typically comes with 10 slices. Each slice is generous in size, ensuring everyone gets a satisfying portion. Whether you're hosting a party or simply craving a hearty meal, the large pizza from Cottage Inn won't disappoint.
With its ample slices, you can enjoy every bite without worrying about running out too quickly. So go ahead, indulge in the perfect size for your pizza cravings.
Pizza Math: Determining the Standard Slice Count
You can determine the standard slice count of a large Cottage Inn pizza by following some pizza math. It's all about pizza proportions and calculating pizza servings.
To start, you need to know the diameter of the pizza. Let's say the large Cottage Inn pizza has a diameter of 14 inches.
Next, you divide the diameter by the average width of a slice. For example, if the average width is 1.5 inches, you'd divide 14 by 1.5, which equals 9.33.
Now, you round down to the nearest whole number, which gives you 9. This means that a large Cottage Inn pizza can be divided into 9 standard slices.
Slice It Up: How Many Slices in a Large Cottage Inn Pizza
To determine the number of slices in a large Cottage Inn pizza, it's important to continue the pizza math discussion by considering the size of each slice. A large pizza from Cottage Inn typically measures around 14 inches in diameter. With this information, you can expect to find about 8 slices in a large Cottage Inn pizza.
However, it's important to note that this number may vary slightly depending on how the pizza is cut. Cottage Inn pizzas are known for their generous portion sizes, making them perfect for sharing at a pizza party or satisfying your own cravings.
Sharing Is Caring: Feeding a Crowd With a Large Cottage Inn Pizza
Feed a crowd with a large Cottage Inn pizza and satisfy everyone's hunger. Planning a pizza party can be a fun and exciting experience, but it's important to ensure that everyone gets enough to eat. Here are some tips to help you navigate the feeding frenzy:
Calculate the number of people you're expecting and determine how many slices each person is likely to eat. On average, one person can consume 2-3 slices of pizza.
Consider ordering a variety of toppings to cater to different preferences. This way, everyone can find something they enjoy.
If you have a large number of guests, it may be more convenient to order multiple large pizzas rather than one giant pizza. This allows for easier handling and serving.
Get Your Slice Fix: Why Cottage Inn's Large Pizza Is Perfect for Pizza Lovers
Indulge in the satisfaction of enjoying multiple slices with Cottage Inn's large pizza, perfect for pizza lovers.
When it comes to pizza, the toppings and crust make all the difference. Cottage Inn understands this, which is why their large pizza is a must-try for any pizza enthusiast.
With a variety of delicious toppings to choose from, including classics like pepperoni and mushrooms, as well as unique options like BBQ chicken and feta cheese, you'll never get bored.
And let's not forget about the crust. Whether you prefer thin and crispy or thick and chewy, Cottage Inn has got you covered.
Their large pizza is the ultimate slice fix, offering generous portions that will satisfy your cravings.
Have you ever found yourself with leftover Domino’s pizza and wondered, ‘Can I freeze it?’ Well, the answer is yes! Freezing your favorite pizza from Domino’s is not only possible but also a convenient way to enjoy it later.
In this article, we will guide you through the process of properly storing, freezing, and reheating your Domino’s pizza, ensuring that every slice tastes just as delicious as the first bite.
So, let’s dive in and discover the secrets to preserving that cheesy goodness.
Yes, you can freeze Domino’s Pizza to enjoy it later, preserving its flavors and textures to perfection. Freezing your favorite pizza from Domino’s is not only possible but also a convenient way to enjoy it later.
Properly Storing Domino’s Pizza
In a world where the mere thought of a Dominos pizza not being devoured in one sitting is blasphemous, you might find yourself pondering the unthinkable: can you freeze Dominos pizza and still enjoy its heavenly taste later?
Let’s embark on this culinary expedition together, armed with a passion for preserving that perfect blend of gooey cheese, robust sauce, and crisp crust. You’re no stranger to the art of savoring a good slice, but the prospect of freezing might have you wading into uncharted waters.
Fear not, for I’m here to guide you through the dos and don’ts, the myths and truths, and the detailed intricacies of transforming your pizza-eating experience. By understanding the fine balance between preserving quality and embracing convenience, you’ll soon discover the secrets to extending the life of your beloved pie.
So, let’s gear up to unravel the mysteries behind freezing Dominos pizza, because who says you can’t have your pizza and freeze it too?
Understanding Pizza Freezing
Why wouldn’t you want to preserve the magic of a Domino’s Pizza for later, ensuring every slice remains as tantalizingly delicious as when first delivered? Freezing temperatures are your secret weapon in this culinary quest. By embracing the chill, you’re not just storing food; you’re locking in the vibrant flavors that make your taste buds dance. But beware, the path to flavor retention is more art than science.
Moisture control is paramount. Too much of it and you’re looking at a soggy disaster; too little, and the crust turns into a cracker. It’s about finding that sweet spot where the crust retains its integrity, tender on the inside, slightly crisp on the outside. And let’s not forget about ingredient compatibility. Not all toppings freeze alike. While cheese and pepperoni might emerge from their icy cocoon as if they’ve never been frozen, veggies and certain sauces can be a bit more finicky, demanding a bit more attention to detail to ensure they don’t turn into a watery mess.
In the end, understanding pizza freezing is your ticket to reliving the Domino’s experience, bite after delicious bite. It’s about preserving not just food, but the joy and comfort that come with it.
Can I Freeze Dominos Pizza
Benefits of Freezing Pizza
By freezing your Domino’s Pizza, you’re not just extending its shelf life; you’re embarking on a culinary journey where every reheated slice offers a burst of original flavor, as if it’s fresh out of the oven. Imagine the joy of rediscovering that perfect blend of cheese, sauce, and toppings, preserved in time, ready to satiate your cravings at a moment’s notice. This isn’t merely about pizza longevity; it’s about indulging in a delightful eating experience whenever you desire.
The act of freezing pizza is a masterstroke in flavor retention. It locks in the essence of what makes Domino’s pizza uniquely delicious, ensuring that the zest and zing of each ingredient are as vibrant on the palate as they were on day one. You’re not losing out; you’re gaining an anytime treat that’s as good as it gets.
Moreover, it’s a significant stride towards waste reduction. No longer do you have to watch uneaten slices go to waste. Instead, you’re equipped with emergency meals and quick snacks that are both convenient and satisfying. Freezing Domino’s Pizza turns the occasional indulgence into a ready-to-enjoy feast that’s waiting for you, exactly when you need it.
Potential Drawbacks
Despite the myriad benefits, freezing your Domino’s Pizza isn’t without its pitfalls, as certain aspects can somewhat diminish the ultimate dining experience. You’re eager to dive into that saved slice, anticipating the joy of your last pizza night, yet, be warned: taste alteration lurks in the frosty depths of your freezer. The vibrant, tangy sauce and rich, melty cheese you remember can undergo a subtle yet noticeable change, losing some of their pizzazz after a chilly stint.
Texture changes are another passionate concern for pizza aficionados. The once crisp crust you adored might now present a soggier demeanor, struggling to recapture its former glory even after a careful reheating dance. Moisture issues play the villain in this scenario, conspiring to rob your pizza of its satisfying crunch.
Don’t overlook the chaos that freezing can wreak on your carefully chosen toppings. Topping displacement becomes a real issue as pieces migrate or clump together, leaving each bite a gamble. And let’s not forget the dreaded freezer burn risk, that fiendish force capable of drying out even the most succulent of slices, leaving you longing for the fresh experience.
Preparing Pizza for Freezing
To ensure your Domino’s Pizza freezes beautifully, embarking on the right preparation steps is crucial. Let’s dive into the passionate world of pizza preservation!
First, consider your pizza toppings and crust choices. The richer the toppings, the more cautious you need to be to preserve that burst of flavor. Thin crusts tend to freeze and reheat better, retaining a nice crunch, while thicker crusts require more care to avoid becoming soggy.
Now, think about your freezer space. You’ll want to ensure your pizza is wrapped tightly in plastic wrap or aluminum foil, then placed in an airtight container or freezer bag. This not only maximizes flavor retention but also makes the most of your freezer space. Remember, air is the enemy of freshness!
When it comes to serving suggestions, reheating your frozen pizza correctly is key to reviving its original glory. A preheated oven will bring back the crispiness of the crust and the gooeyness of the cheese, making it taste almost as good as the day you bought it.
Freezing Domino’s Pizza isn’t just about convenience; it’s a culinary adventure that ensures you can enjoy your favorite meal any time, preserving its flavors and textures to perfection.
Best Freezing Practices
Embracing the best freezing practices ensures your Domino’s Pizza remains as irresistibly delicious as the moment it left the oven, ready to satisfy your cravings anytime. Dive into the art of freezing with enthusiasm, and let’s ensure every bite brings back the joy of the first.
When it comes to locking in that mouthwatering flavor and keeping texture changes at bay, consider:
Freeze Duration: Don’t let your pizza play hide and seek in the freezer for too long. Aim to enjoy it within 1-2 months for the best taste and quality.
Storage Containers: Invest in airtight storage containers or heavy-duty freezer bags. These champions of flavor retention keep freezer burn at bay and your pizza tasting like it’s fresh from Domino’s oven.
Health Considerations: Wrap your pizza slices individually. This not only helps in maintaining the pizza’s integrity but also makes it easier for you to manage portion sizes. Remember, good health is as important as good taste.
Packaging Tips
Now that you’ve mastered the art of freezing your Domino’s Pizza for optimum freshness, let’s dive into the essential packaging tips that’ll ensure every slice is as captivating as the last.
The key to victory in the freezer lies in your material choices and seal tightness. Opt for heavy-duty aluminum foil or freezer-proof plastic wrap to swaddle each piece. This isn’t just about keeping air out; it’s a loving embrace that tells freezer burn to back off.
Repackaging methods are your next best friend. If you’re dealing with multiple slices, separate them with parchment paper before the big wrap. This trick prevents them from becoming a single, indistinguishable pizza block. After wrapping, place your slices in a freezer bag. Squeeze out as much air as possible to seal the deal against any frosty foes.
Don’t forget the label importance! Mark each package with the date of freezing. It’s not just practical; it transforms your freezer into a treasure chest of pizza delights, perfectly preserved and ready to enchant your taste buds on a moment’s notice.
With these packaging tips, you’re not just freezing pizza; you’re capturing the magic of a fresh Domino’s slice for later.
Thawing Your Pizza
Once you’ve mastered the art of freezing, it’s time to unveil the secrets of perfectly thawing your Domino’s Pizza, reigniting the magic of that first bite. Thawing isn’t just a step; it’s an essential art that ensures every reheated slice brings back the joy and flavors you remember.
Let’s dive into the most effective thawing methods, each promising to restore your pizza to its glorious best.
Room Temperature: Begin by letting your frozen pizza sit out at room temperature for about an hour. This gentle thawing method awakens the flavors without compromising the texture of the crust. It’s a simple yet effective counter technique that sets the stage for a delicious reheating process.
Refrigeration Thaw: If you’re not in a rush, transferring your pizza from the freezer to the refrigerator overnight offers a slow, even thaw. This method ensures that every ingredient, from the gooey cheese to the robust sauce, melds together beautifully, creating a perfect harmony of tastes.
Microwave Thawing: For those moments when you can’t wait, a brief stint in the microwave can do the trick. Use the defrost setting to gently revive your slice, making sure to monitor closely to avoid any sogginess.
Each of these thawing methods offers a unique way to bring your Domino’s Pizza back to life, ensuring that every bite is as satisfying as the first.
Reheating Frozen Pizza
After mastering the art of thawing your Domino’s Pizza, you’re ready to dive into the secrets of reheating it to crispy, cheesy perfection. The journey to reviving your pizza begins with choosing the right method.
If you’re after that irresistible crunch in the crust with perfectly melted cheese, your oven is your best friend. Preheat it to a golden spot between 375°F to 400°F. This range of oven temperatures ensures that every slice gets evenly heated, bringing back the pizza’s glory without drying it out.
Now, let’s talk reheat times. Typically, 8 to 10 minutes should do the trick, but keep an eye on the crust’s edge and the cheese’s bubbliness. It’s these visual cues that scream, ‘I’m ready!’
For those in a hurry, microwave tips come in handy. Though not ideal for crust crisping, a microwave can still deliver a decent slice. Place a cup of water alongside your pizza to fend off sogginess, microwaving it for about 30 seconds to a minute. The steam helps in cheese melting and keeps the crust from turning too tough.
Embrace these reheating rituals, and you’ll resurrect your Domino’s Pizza to its former, glorious state!
Can I Freeze Dominos Pizza
How Long to Freeze
Understanding the optimal freezer duration for your Domino’s Pizza is crucial, as it ensures your feast retains its delightful taste and texture for your next indulgent moment. You’re not just freezing a pizza; you’re preserving an experience, a slice of joy for those days when cooking is the last thing on your mind.
But how long can you keep this culinary treasure stashed away in the icy confines of your freezer?
Here’s what you need to know:
Freezing duration: Ideally, your Domino’s Pizza shouldn’t spend more than 1 to 2 months in the freezer. Beyond this, you risk losing the vibrant flavors and succulent textures that make your pizza so enjoyable.
Optimal temperature: Ensure that your freezer is at a consistent 0°F (-18°C). Fluctuating temperatures can lead to freezer burn, affecting the quality of your pizza.
Storage containers: Opt for airtight storage containers or freezer bags to maximize space and maintain quality. This protects your pizza from absorbing odors and prevents ice crystals from forming on the surface.
Common Mistakes to Avoid
Frequently, pizza aficionados inadvertently compromise their frozen Domino’s Pizza’s quality by overlooking some critical storage steps, so let’s dive into the common mistakes you should sidestep to savor every slice as intended.
First off, ignoring the optimal storage temperature is a blunder you can’t afford to make. Your freezer should be set at 0°F (-18°C) or lower to halt bacterial growth and ensure flavor preservation. Failing to maintain this temperature not only risks your health but also degrades the deliciousness that Domino’s masterfully crafts into each pizza.
Another adversary of your frozen treasure is freezer burn. This moisture-zapping monster can turn your cheesy delight into a dry, tasteless disc. The secret to combating this is airtight packaging. Wrap your pizza in plastic wrap, followed by aluminum foil, to lock in moisture and keep those pesky ice crystals at bay.
Let’s talk about ingredient separation – a heartbreak for any pizza lover. When cheese and toppings begin to part ways with the crust, the integrity of your pizza is compromised. This typically happens when the pizza isn’t cooled before freezing, leading to an uneven distribution of moisture.
Lastly, the crust texture is paramount. A soggy or overly hard crust can ruin the experience. To avoid this, ensure your pizza is evenly cooled and properly wrapped before it hits the freezer. This keeps the crust’s texture as close to its original state as possible, ensuring that each reheated slice brings back the joy of that first, fresh bite.
Pizza Freezing Myths Debunked
While many believe that freezing a Domino’s Pizza sacrifices its soulful taste and crunchy crust, we’re here to peel away the myths and reveal the truth about preserving your favorite slices. Let’s dive deep into the freezer and debunk some of the most common misconceptions:
Freezing temperature myths: It’s a common belief that freezing will somehow disrupt the delicate balance of flavors. However, if done correctly, freezing locks in the freshness, ensuring that your slice is just as delightful when reheated.
Crust texture concerns: Worried that your crust will turn into a cardboard imitation of its former self? Fear not! The key is in the reheating process. A quick stint in a hot oven can bring back that beloved crunch.
Sauce separation fears and cheese texture changes: Many fret over the sauce losing its rich consistency and the cheese becoming rubbery. Yet, when properly stored and thawed, these components can beautifully retain their textures and flavors.
Now that we’ve debunked the common myths surrounding the freezing of your beloved Domino’s Pizza, let’s explore how to revel in the experience of savoring it after it’s been perfectly preserved.
Imagine the joy of biting into a slice where the pizza toppings are as vibrant and flavorful as the day you first laid eyes on them. Whether you’re a fan of the classic pepperoni or you venture into the realm of pineapple and ham, the freezing process can lock in those flavors, ready to explode in a symphony of taste upon reheating.
But don’t stop there; the type of crust you choose—be it the thin, crispy variety or the thick, doughy delight—can make a world of difference in your frozen pizza experience. Reheating it to just the right crispness can bring back that just-baked magic.
To elevate your meal further, consider pairing your pizza with an array of dipping sauces. From the zesty tang of garlic sauce to the creamy richness of ranch, each dip offers a new dimension of flavor. And for serving suggestions that truly enhance your feast, try adding a sprinkle of fresh herbs or a dash of chili flakes to your slice.
These flavor enhancements ensure that each bite is a tantalizing treat, turning your frozen pizza into a gourmet experience right at home.
Frequently Asked Questions
Can I Freeze Domino’s Pizza With Toppings That Are Traditionally Considered Fresh, Like Avocado or Arugula, Without Compromising Taste or Texture?
Freezing methods matter! Quick freezing can minimize taste alteration, but you’ll want to consume it quickly after thawing to preserve that burst of flavor.
It’s a culinary adventure, ensuring your favorite slice remains deliciously enjoyable!
Is It Safe to Refreeze Domino’s Pizza After It Has Been Thawed, if It Was Not Reheated?
Absolutely! You can dive into the world of pizza preservation fearlessly.
When tackling safety concerns after thawing, remember, not reheating before refreezing might invite texture changes, yet it’s still safe.
Embrace various thawing methods and reheating techniques to champion flavor retention.
This passionate journey ensures you savor every bite with its original gusto, proving that your beloved pizza can withstand the whims of time and temperature with grace!
How Does Freezing Affect the Nutritional Value of Domino’s Pizza, Particularly in Terms of Vitamins and Minerals?
Freezing your pizza might seem like a culinary sin, but let’s dive into how it impacts its vitamins and minerals.
The freezing process is surprisingly kind to vitamin retention and mineral stability, ensuring your pizza retains most of its nutritional value. When you compare the nutritional content before and after freezing, there’s little difference.
Even after thawing, the impact is minimal. So, you can enjoy your pizza with nearly the same health benefits, guilt-free!
Are There Any Specific Domino’s Pizza Varieties or Crust Types That Freeze Better Than Others?
Absolutely, some varieties do freeze better! When comparing crusts, thicker ones retain texture better after freezing, thanks to robust structure.
Dive into freezing techniques, like wrapping slices tightly to prevent freezer burn. Aim for toppings that freeze well—think meats over veggies to dodge sogginess.
Storage duration matters; enjoy within a month for peak flavor. Embrace slight texture changes; they’re a small trade-off for extending the joy of your favorite slice!
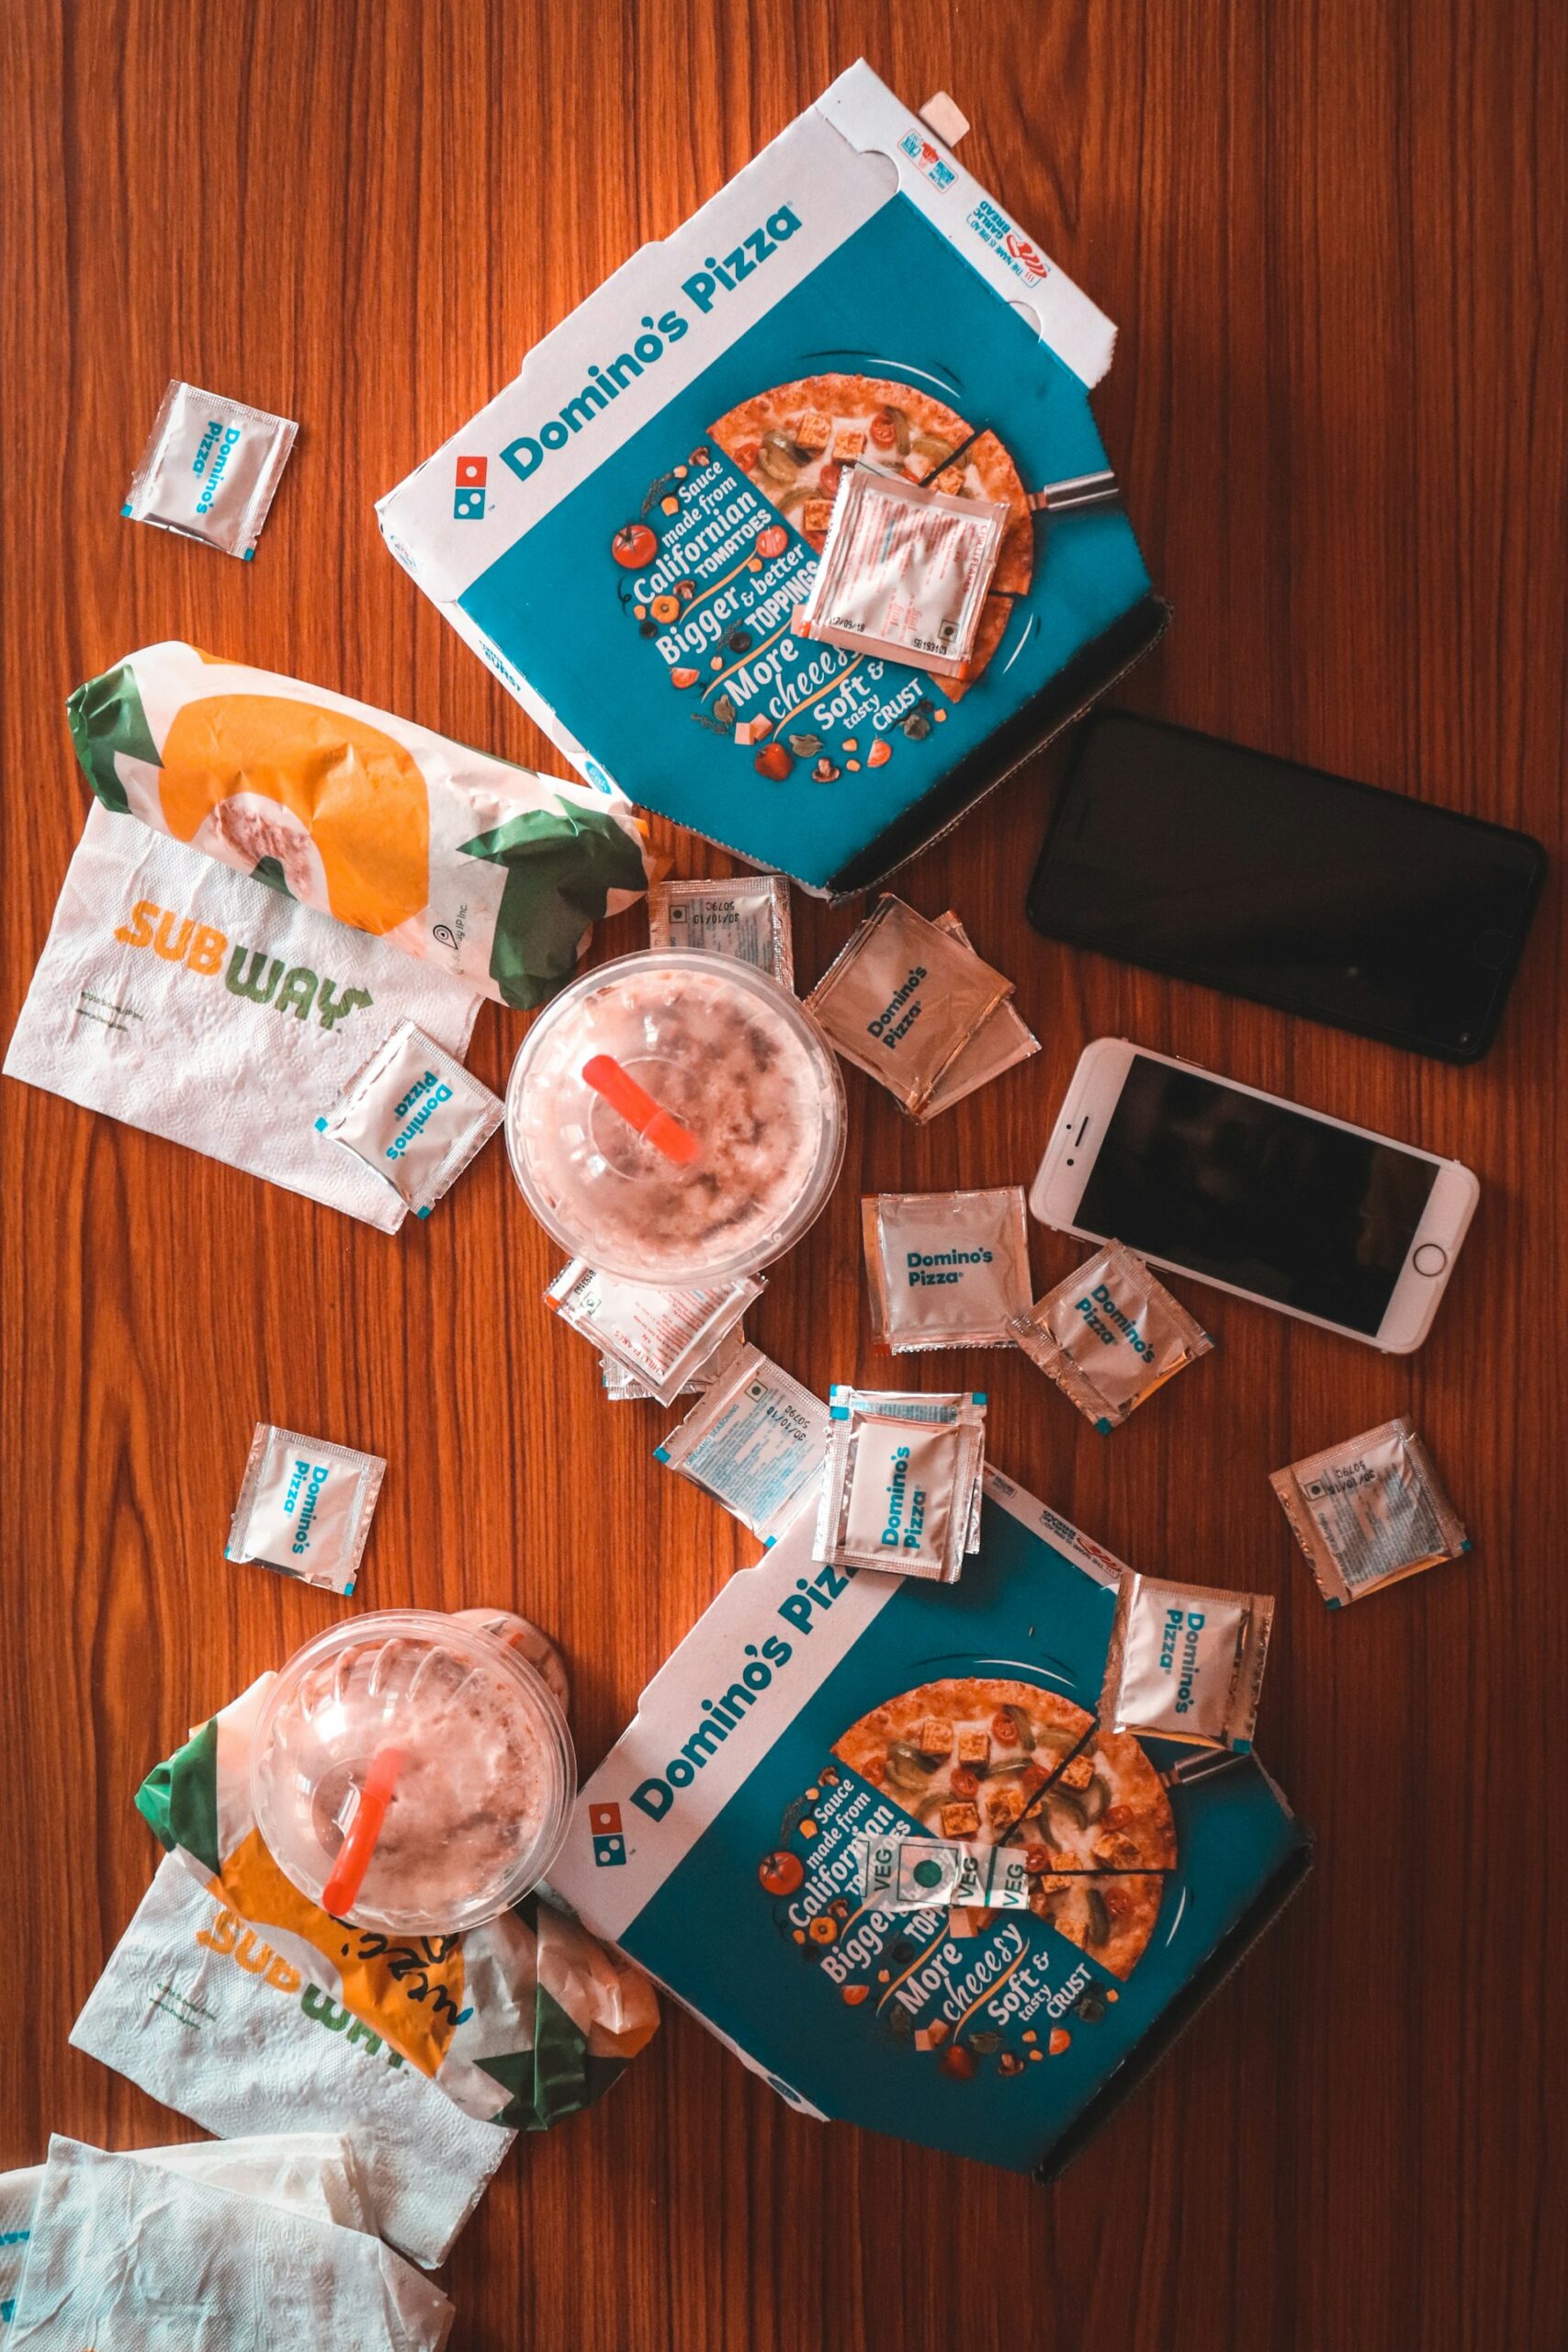
Can I Freeze Domino’s Pizza in the Original Box, or Do I Need to Remove It for Optimal Storage Conditions?
You’re walking a fine line between freshness and freezer burn when freezing your pizza.
Ditch the original box—it’s a giant in a world of box size considerations, does little for moisture control, and invites freezer burn.
Wrap it tightly in aluminum foil or plastic wrap for optimal packaging alternatives.
This method not only prevents freezer burn but also ensures your reheating method brings back that just-delivered taste.
Conclusion
Absolutely, you can freeze Domino’s pizza and relish it later! By embracing the best freezing practices, you’re ensuring that delightful taste remains intact.
Did you know, a survey found that 82% of people find frozen pizza as satisfying as fresh? That’s because proper freezing retains the pizza’s soulful flavors.
So, avoid those common pitfalls, debunk those myths, and dive into the joy of savoring your perfectly preserved slice. Remember, every bite should be as thrilling as the first!
Do you know that 93% of stewards crave a pizza that satisfies their sophisticated taste buds?
Well, get ready to unravel the secrets of the steward's pizza preferences! In this article, we'll explore traditional toppings that make their mouths water and unexpected flavors that might surprise you.
From crispy thin crusts to chewy deep-dish delights, we'll decode the perfect pizza for the discerning steward.
Get ready for a mouthwatering journey into the world of the steward's pizza desires!
The Steward's Pizza Profile
If you frequently serve pizza to the steward, you know exactly what toppings to include on their pizza.
The steward has very specific pizza crust preferences, always opting for a thin and crispy crust that provides the perfect balance between a satisfying crunch and a chewy bite. They believe that the crust is the foundation of a great pizza, and it must be cooked to perfection.
As for their favorite pizza toppings, the steward has a penchant for classic combinations. They enjoy the timeless duo of tangy tomato sauce and gooey mozzarella cheese, topped with savory pepperoni and a sprinkle of aromatic basil.
The steward's pizza profile reflects their refined taste and appreciation for simplicity and tradition.
Exploring Traditional Pizza Toppings
To continue exploring traditional pizza toppings for the steward, let's delve into the variety of delicious options that will surely satisfy their refined taste buds. Pizza isn't just a simple combination of dough and cheese; it's a canvas for culinary creativity. Here are three exciting toppings that showcase the diversity of regional pizza variations and unique flavors from around the world:
Neapolitan Margherita: This classic Italian pizza features a thin, chewy crust topped with San Marzano tomatoes, fresh mozzarella cheese, basil leaves, and a drizzle of extra virgin olive oil. It's a timeless combination that celebrates the simplicity of traditional Neapolitan pizza.
Hawaiian: Contrary to popular belief, this tropical delight is a beloved pizza topping in many parts of the world. The sweet and tangy flavors of pineapple perfectly complement the salty taste of ham or bacon, creating a harmonious balance of flavors.
Indian Butter Chicken: This fusion pizza takes inspiration from the flavors of Indian cuisine. Topped with marinated chicken tikka, creamy butter chicken sauce, red onions, and cilantro, it brings together the warmth of Indian spices and the comfort of a traditional pizza.
These unique toppings from different corners of the globe add excitement to the pizza experience, offering a delightful journey for the steward's taste buds.
Unconventional Flavors That Might Surprise You
Continuing our exploration of traditional pizza toppings, let's dive into the realm of unconventional flavors that might surprise you.
When it comes to pizza, we tend to stick to the classics like pepperoni, mushrooms, and onions. But have you ever considered stepping out of your comfort zone and trying some unique pizza combinations?
Imagine the delightful explosion of flavors that can happen when you combine unexpected ingredients on a crispy crust. How about a pizza topped with smoked salmon, cream cheese, and capers? Or maybe you'd be intrigued by a combination of figs, prosciutto, and gorgonzola cheese.
These unusual ingredients for pizza toppings can add a whole new dimension to your pizza experience. So why not be adventurous and give them a try? You might just find your new favorite flavor combination.
The Perfect Crust for the Steward's Taste
When it comes to your taste, the perfect crust for your pizza is crucial in elevating your dining experience. The crust sets the foundation for the entire pizza, and finding the right one can make all the difference.
Here are three types of pizza dough that you should consider experimenting with:
Classic Neapolitan: This dough is known for its thin, chewy texture and slightly charred crust. It's made with just a few simple ingredients like flour, water, salt, and yeast. The result is a crust that's light and airy, allowing the toppings to shine.
Deep Dish: If you're a fan of thick, hearty crusts, then deep dish dough is for you. This dough is pressed into a deep pan, creating a buttery and flaky crust that can hold up to generous amounts of sauce, cheese, and toppings.
Whole Wheat: For a healthier twist on pizza, try using whole wheat dough. This dough adds a nutty flavor and a slightly denser texture to your pizza. It's a great option for those looking to incorporate more whole grains into their diet.
Experimenting with different crust flavors can add a whole new dimension to your pizza experience. Whether you prefer a classic Neapolitan, a deep dish, or a whole wheat crust, the perfect dough can take your pizza to the next level.
Decoding the Steward's Pizza Preferences
Now let's delve into the Steward's pizza preferences and decipher what kind of pizza they truly desire.
Analyzing the steward's favorite pizza toppings can give us a glimpse into their taste buds. Maybe they prefer the classic combination of pepperoni and cheese, or perhaps they've a more adventurous palate, opting for toppings like artichokes and sun-dried tomatoes.
It's also worth uncovering the steward's secret pizza cravings. Do they secretly crave a deep-dish pizza with a thick, doughy crust, or do they lean towards a thin and crispy New York-style pizza?
Decoding the steward's pizza preferences is like solving a delicious puzzle, and by doing so, we can ensure that they're served a pizza that will truly satisfy their cravings.
Imagine sinking your teeth into a slice of Papa John's pizza, the cheese melting in your mouth like a warm embrace.
But what if you have leftovers? Fear not! In this article, we'll show you how to reheat Papa John's pizza in the oven to recapture that fresh-out-of-the-box taste.
With just a few simple steps, you'll be savoring every bite of hot and delicious pizza, as if Papa John himself delivered it straight to your door.
This will ensure that the pizza is evenly reheated and maintains its delicious flavors. The recommended oven temperature and reheating time may vary depending on the thickness of the pizza and your personal preference. Keep an eye on the pizza as it reheats to avoid overcooking or burning.
The oven temperature and reheating time are crucial factors in achieving that perfect balance of crispy crust and melted cheese. So, take the time to preheat your oven properly and enjoy a warm, mouthwatering slice of Papa John's pizza.
Prepare the Pizza Slices
To prepare your Papa John's pizza slices for reheating, gather a baking sheet and your desired toppings.
Reheating pizza is an art, and the key lies in preserving the deliciousness of the original pie. Start by arranging the pizza slices on the baking sheet, making sure they're evenly spaced. This will allow for even heat distribution and prevent any parts from becoming soggy.
Now, it's time to add your personal touch with toppings. Whether it's extra cheese, pepperoni, or even some fresh basil, the choice is yours. Get creative and make your reheated pizza slices even more mouthwatering. Remember, the reheating process will bring your pizza back to life, but the toppings will elevate it to a whole new level. So go ahead and experiment with different ingredients to satisfy your cravings.
Once you're done preparing the pizza slices, it's time to move on to the next step: the reheating process.
Place the Pizza in the Oven
Now that you have prepared your Papa John's pizza slices with your desired toppings, it's time to place them in the oven.
Reheating pizza in the oven is one of the best methods to achieve that perfect crispy crust and melty cheese. Preheat your oven to 375°F (190°C) and line a baking sheet with aluminum foil. This will prevent any mess and make cleanup easier.
Carefully place the pizza slices on the baking sheet, making sure they're evenly spaced. If you want to try alternative options, you can also use a pizza stone or a pizza pan with holes to achieve a crispy bottom.
Once the oven is preheated, place the baking sheet with the pizza slices on the center rack. Set the timer for 10-12 minutes, or until the cheese is bubbly and the crust is golden brown. Keep an eye on them to avoid burning.
When the timer goes off, carefully remove the baking sheet from the oven using oven mitts. Your reheated Papa John's pizza is now ready to be enjoyed!
Monitor the Pizza's Reheating Process
Once the pizza slices are in the oven, you can monitor their reheating process to ensure they come out perfectly crispy and delicious.
Start by tracking the reheating time. Set a timer or keep an eye on the clock to ensure you don't overcook the pizza. The ideal reheating time will vary depending on your oven and personal preference, but a good starting point is around 10 minutes.
While the pizza is heating, it's important to check for even heating. Open the oven door halfway through the reheating process and rotate the pizza slices if necessary. This will help to ensure that all parts of the pizza are evenly heated and avoid any burnt or undercooked spots.
Enjoy Your Hot and Delicious Papa John's Pizza
Savor the mouthwatering flavors of your piping hot and delicious Papa John's pizza. After successfully reheating your pizza in the oven, it's time to indulge in this delectable treat. Here are some tips to enhance your pizza experience and make the most out of your leftovers:
Spice it up: Add a sprinkle of crushed red pepper flakes or a dash of hot sauce to give your pizza an extra kick.
Get creative with toppings: Experiment with different toppings like fresh basil, sliced tomatoes, or even some grilled chicken to elevate the flavors.
Pair it with a dip: Whip up a simple garlic butter sauce, marinara, or ranch dressing to dip your pizza in for an extra burst of flavor.
When it comes to storing your leftover pizza, remember these helpful tips:
Wrap it up: Wrap each slice individually in aluminum foil or plastic wrap to keep it fresh.
Refrigerate promptly: Place the wrapped slices in an airtight container and store them in the refrigerator within two hours of ordering.
Reheat with care: When reheating, always use the oven or a skillet for the best results. Avoid using the microwave as it can make the pizza soggy.
Now, enjoy your perfectly reheated Papa John's pizza and savor every bite!
Want to recreate the taste of heaven in your own kitchen? Look no further than New Haven style pizza. This mouthwatering delicacy, with its thin and charred crust, is a slice of pure bliss.
In this article, we'll guide you through the art of making this delectable pie. From the essential ingredients to the secret techniques, you'll learn everything you need to know to create your own picture-perfect New Haven style pizza.
Get ready to indulge in a taste like no other.
Authentic New Haven Style Pizza: A Brief History
To understand the origins of authentic New Haven style pizza, start by exploring the rich history of this beloved culinary tradition.
New Haven style pizza has had a significant cultural impact on the city and beyond. It originated in the early 20th century when Italian immigrants brought their love for pizza to the shores of New Haven, Connecticut.
Over the years, this style of pizza has evolved, with various pizzerias adding their own unique twist to the traditional recipe. The evolution of New Haven style pizza recipes has resulted in a distinct thin and crispy crust, topped with a vibrant tomato sauce and a generous sprinkling of grated Parmesan cheese.
The combination of flavors and textures has made New Haven style pizza a beloved and iconic dish in the area.
Essential Ingredients for New Haven Style Pizza
To make New Haven style pizza, you'll need several essential ingredients. Let's start with the pizza dough. For that authentic thin and crispy crust, you'll want to use high-gluten flour, water, yeast, olive oil, and a pinch of salt. The dough needs to be stretched thin and cooked at a high temperature to achieve that perfect New Haven style texture.
Next, let's talk about the pizza sauce. Traditional New Haven style pizza calls for a simple sauce made from crushed tomatoes, garlic, olive oil, and a touch of salt and sugar. It's important to let the flavors meld together by simmering the sauce for at least 30 minutes before using it on your pizza. The sauce should be smooth, tangy, and slightly sweet, complementing the other toppings without overpowering them.
With the right pizza dough and sauce, you're well on your way to creating an authentic New Haven style pizza that will transport you straight to the heart of Connecticut.
Mastering the Perfect Thin and Charred Crust
To achieve the perfect thin and charred crust for your New Haven style pizza, you'll want to follow these essential steps:
Start with a well-rested pizza dough, allowing it to rise for at least 24 hours for maximum flavor and texture.
Preheat your wood-fired oven to a scorching temperature of around 800°F (427°C) to create that distinctive char.
Stretch out the dough into a thin, even round shape, ensuring it isn't too thick to achieve the desired crispiness.
Slide the pizza into the blazing inferno of the wood-fired oven, allowing it to cook for a mere 2-3 minutes, until the crust is beautifully blistered and charred.
By following these steps with precision and care, you'll be rewarded with a New Haven style pizza boasting a thin and charred crust that perfectly complements the delicious toppings.
Enjoy the intimate experience of creating and savoring this culinary masterpiece.
Sauce and Cheese: The Key to a Delicious New Haven Pie
For a delicious New Haven pie, you'll want to use a generous amount of sauce and cheese.
In New Haven style pizza, the sauce and cheese play a crucial role in creating the perfect balance of flavors.
When it comes to cheese, you have a few options. The most traditional choice is a combination of mozzarella and pecorino romano, which adds a sharp and salty kick. However, you can also experiment with other types of cheese like provolone or Parmigiano-Reggiano.
As for the sauce, using fresh tomatoes is of utmost importance. The vibrant, tangy flavor of fresh tomatoes elevates the taste of the pizza. To make the sauce, simply crush the tomatoes with your hands and add a pinch of salt and sugar to enhance the natural sweetness.
Unique Toppings: Exploring Clams, Garlic, and More
After creating the perfect sauce and cheese combination, it's time to explore unique toppings for your New Haven style pizza, including clams, garlic, and more. Take your pizza to the next level by experimenting with alternative crusts and adding unique cheeses. Here are some mouth-watering options to consider:
Fresh Clams: Give your pizza a taste of the sea with tender, succulent clams that burst with flavor.
Roasted Garlic: Add a touch of sweetness and depth to your pizza with caramelized cloves of roasted garlic.
Hot Cherry Peppers: Spice things up with these fiery peppers that will leave your taste buds tingling.
Pesto Sauce: Swap out the traditional tomato sauce for a vibrant and aromatic pesto that will make your pizza burst with freshness.
Fresh Basil: Enhance the flavors of your pizza with fragrant basil leaves that add a refreshing and herbaceous note.
With these unique toppings, your New Haven style pizza will be a culinary masterpiece that will leave everyone craving for more.
Baking and Serving: Tips for a Picture-Perfect New Haven Pizza
How can you achieve a picture-perfect New Haven pizza when it comes to baking and serving?
The key lies in mastering the baking techniques and presentation tips that will elevate your pizza from ordinary to extraordinary.
Start by preheating your oven to the highest temperature possible, ensuring a crispy crust and bubbly cheese. To achieve that iconic charred crust, bake your pizza directly on a pizza stone or a preheated baking sheet.
As for serving, consider investing in a pizza peel for an authentic touch. Carefully slide your pizza onto the peel, and then transfer it to a cutting board for slicing.
Garnish with fresh basil leaves or a sprinkle of grated Parmesan to add a pop of color and flavor.
With these techniques and tips, you can wow your guests with a truly remarkable New Haven pizza.
Are you ready to embark on a culinary adventure like no other? Get ready to create the ultimate pizza masterpiece with our guide on how to make everything pizza Hello Kitty Island Adventure.
From choosing the perfect crust to layering mouthwatering toppings, we'll show you step-by-step how to make a pizza that's as delicious as it is whimsical.
So grab your apron and let's dive into the world of pizza making, Hello Kitty style!
Choosing the Perfect Pizza Crust
To choose the perfect pizza crust, consider your personal preferences and the desired texture of your pizza.
Different types of crust offer a range of flavors and textures that can enhance your pizza experience.
If you prefer a thin and crispy crust, go for a traditional New York-style crust. It's thin, yet sturdy enough to hold all your favorite toppings.
For a chewy and doughy crust, try a Neapolitan-style crust. It's made with high-protein flour and fermented for a longer period, resulting in a soft and airy texture.
If you have dietary restrictions, don't worry. Many pizzerias now offer gluten-free options, so you can still enjoy a delicious pizza without the gluten.
Whether you prefer a classic crust or a gluten-free alternative, choosing the right crust will elevate your pizza to new heights.
Preparing the Homemade Tomato Sauce
For the homemade tomato sauce, you'll need to gather fresh tomatoes and a variety of herbs and spices. Making a spicy tomato sauce adds an exciting kick to your pizza. If you want to experiment with flavors, you can also try using alternative tomato sauce bases like sun-dried tomatoes or roasted red peppers.
To start, blanch the fresh tomatoes in boiling water and then peel off the skin. Remove the seeds and roughly chop the tomatoes. In a saucepan, heat some olive oil and sauté minced garlic until fragrant. Add the tomatoes, herbs, and spices such as basil, oregano, red pepper flakes, salt, and black pepper. Simmer the sauce for about 30 minutes, stirring occasionally. The longer you simmer, the richer the flavors will become.
Adjust the seasoning to your taste and let the sauce cool before spreading it on your pizza crust.
Layering the Toppings: Meats and Cheeses
Layer the toppings with a generous amount of your favorite meats and cheeses. The key to creating a delicious and unique pizza is to experiment with different types of cheeses. Consider using a combination of mozzarella, cheddar, and parmesan for a rich and creamy flavor.
If you're feeling adventurous, try adding some blue cheese or feta for a tangy kick. As for the meats, get creative with your combinations. Classic choices like pepperoni and sausage are always crowd-pleasers, but don't be afraid to think outside the box.
How about some prosciutto and salami for a gourmet twist? Or maybe some spicy chorizo and bacon for an extra kick? The possibilities are endless, so let your taste buds guide you as you layer on the meats and cheeses, creating a pizza masterpiece that will leave your friends and family begging for more.
Adding a Splash of Color With Veggies and Olives
Get ready to brighten up your pizza masterpiece by adding a vibrant assortment of veggies and olives. Creating a rainbow pizza isn't only visually stunning but also a tasty way to incorporate a variety of vegetables into your meal.
Start by selecting an array of colorful vegetables such as bell peppers, cherry tomatoes, red onions, and spinach. Slice these veggies thinly to ensure even cooking and easy biting.
Arrange them on your pizza in a creative and visually appealing pattern, allowing the colors to pop and bring life to your dish. Don't forget to add some sliced black olives for a burst of flavor.
Baking and Enjoying Your Hello Kitty Pizza Creation
To bake and enjoy your Hello Kitty pizza creation, you'll need to preheat your oven to the desired temperature.
While the oven is heating up, carefully transfer your pizza onto a baking sheet or pizza stone. Make sure to handle it gently, so you don't ruin your creative pizza design.
As you slide it into the oven, you can already imagine the delicious smells that will soon fill your kitchen. Now, it's time to wait patiently for your pizza to bake to perfection.
As the cheese melts and the crust turns golden brown, the anticipation builds. Finally, when the timer goes off, take out your Hello Kitty pizza from the oven.